Pocketcharts and Literacy: Pocketcharts are one of my favorite tools to use to teach. The activities that you can do with them are endless. One of my favorite things to do, is to take the poems/songs that we use and write them on sentence strips. (If I put them in the pocketchart, I don't use a Poetry or Song Chart. We read them straight from the pocketchart.) I try to use different color sentence strips or different colors of marker to write them. I alternate the pattern depending on what I'm using. Then I make a matching set of strips, laminate all, and cut the words on the second set of sentence strips apart. Place the first set of sentence strips in the pocketchart, and the students match the words to the text in the pocketchart. (For a visual and more details, visit the Easter page. The first activity on the page is using this technique.) This activity is great for teaching one-to-one correspondence/tracking, left-to-right, top-to-bottom; provides practice reading new vocabulary words and sight words, and word discrimination. This activity can also be used as a Literacy Center activity or as material for "Read the Room". Pocketcharts are also great places for sorting into 2 or 3 categories. This past week, I used my pocketcharts for 2 different sorting activities. The first activity was a Learning Center activity. The students were to sort sentence strips that I'd typed up using a 72 pt font on landscape sized paper. They were to sort the sentences into "telling/statement (.)" and "asking/question (?)" categories. Both headings were typed up in the same format as the sentences, then all were cut apart into strips. The two headings were placed on the top row of the pocketchart, and the students sorted the sentence strips into the two categories. Some of the sentences contained the correct punctuation and some contained no punctuation. The punctuated sentences were added to give some students a boost in getting started. The other activity was an independent activity for one student. We've been working on identifying compound words, so I wrote two headings on two index cards: "compound word" and "not a compound word." Then I wrote compound words, as well as words that weren't compound words, on individual index cards. The two cards with the headings were placed on the top row of the pocketchart. The student was to read the word on each card and place it underneath the correct heading. Pocketcharts also work exceptionally well for students who are practicing putting words into alphabetical order. I was often very exasperated with my students when working on ABC order because they were forever forgetting a word, and instead of going back and erasing the words and inserting it into the correct place, they'd just take the easy way out and write it at the end of the list. Then I decided to write their words on 3x5 index cards and let them physically put them in ABC order in the pocketchart. After they get them in the right order, then they copy them onto their paper. I also provided an ABC strip in the top row of the pocketchart for them to use. Those ABC desktapes that you can purchase by the roll from the school supply places, stuck onto a sentence strip and laminated makes perfect ABC strips. (I flip mine over and stick a number- line desktape to the back of it before I laminate it and it does dual duty.) Anyway, once I started letting my students use the cards and pocketchart for doing their ABC order activities, their work drastically improved. You can also use pocketcharts for sequencing activities. I use mine for picture card sequencing, sequencing pictures to match a story, sequencing sentence strips to match a story, and for changing the text of a song or poem. By moving the sentence strips around, you can change the meaning/wording of a song or poem. In the picture below, I used the pocketchart as a Center for sequencing the months of the year. I purchased a Birthday set that had the name of each month written on a cupcake. The students were provided a "master list" of the months to use in sequencing the months in the pocketchart. (And I never intended on using the Birthday set for birthdays! :)
Lots of matching can be done with a pocketchart. I find that I like the way the rows in the chart help my students keep their work in a confined area. You can place letter cards at the beginning of each row and have the students match pictures to the correct beginning/middle/ending sound. Ex. b: bell, ball, balloon, bat, banana Students can match rhyming word or picture cards, capital to lowercase letter cards, antonyms, synonyms, homonyms, etc. They can also match pictures to sentences. This past week I also started using my pocketchart for a Making Words Center. I put a card up with the word "shamrock" on it, and the letter cards underneath the word to match. The students were to manipulate the letters to form at least 15 words. After they made each word, they wrote it on a big piece of paper using a marker. I intend on using this Center each week by changing the word being used. This week's word will be "Easter". They can make words like: tear, rat, sat, ear, east, tease, eat, seat, rate, ease, star, steer, etc. I may have to lower the number of words required though because this activity is harder than the one last week. However, I could use "Peter Rabbit" and then raise the number of words required.
This brings me to another activity that I use the pocketchart for: Spelling. I made letter cards using Excel and printed them out on cardstock. Then I had them laminated and cut them out on the grid lines. I made them tall enough so that the letters would stick out over the top of the plastic strip on the pocketchart, but narrow enough to fit in the tiny drawers of a bin where I store them. My aide donated one of those bins with the drawers that are purchased to put screws and such in. She painted it for me, then I added the capital and lowercase letter label to the front of each drawer. The letters are stored in this bin. The children use the letters to form each of their spelling words in the pocketchart. Once they've formed all words, then an adult checks their work. Any words misspelled or redone. Once given the "all clear" sign, the students resort the letters back into the drawers for the next student.
The thing with the drawers came about because I have one student who just doesn't have the organizational ability/reasoning/persistence to sort through all those letters looking for the ones that he needs. Putting them into "categories" allowed him to now successfully accomplish this activity. And now that I have all the letters pre-made, I use them in other activities besides the Spelling Words activity as well. I also use my pocketchart as a portable Word Wall sometimes. I don't really have a good place for a Word Wall this year, despite the new classroom, so I use my pocketchart for a theme/unit based Word Wall. I type up vocabulary words, add a graphic, then print them off on cardstock. Laminate and cut them out, and they're ready to be used in the pocketchart. Be sure not to make your word cards any taller than 4 inches or they'll overlap onto the next row. The good thing about this Word Wall is that it's the height of your students and they can manipulate the word cards. You can also make an extra set of cards without the picture and have the students match the words. You could use the word cards in conjunction with the letter cards and have the students build the words as well.
Here's another activity I added to our Morning Meeting. Morning Meeting is when we go over our Calendar, Weather, Days of the Week chart, Months of the Year chart, seasons, coins & their value, how much money we should have in our bank (according to the date for the month), Month Poem, Word Wall, Today Song, Pledge, & Book of the Day (not necessarily in that order). This is the Today Song. We read the song first and a designated student gets to put the correct words in the blanks while being helped by the rest of the group. Then we reread the song, then we sing it a couple of times while I track with my pointer. The tune is Frere Jacques.
If you visit my individual theme/unit pages, you'll see many other ways of using pocketcharts as well. I also use my pocketchart to help reinforce comprehension. I copied pictures from our reading skills pages and typed up simple sentences to go with them. The children then match the correct sentence to the picture. The pocketchart is big enough to accomodate two rows of sentences (printed landscape onto cardstock and laminated) and two matching pictures on 3x5 index cards (also laminated).
Another activity is to use it for practicing skills such as telling/asking sentences. Students read the sentence and place the correct punctuation at the end. This can be done individually or as a small group.
Punctuating Telling/Asking Sentences
Punctuating Telling/Asking Sentences Test
Sort days of the week into correct and incorrect columns
Sequence days of the week
This is a chart that I cut apart.
Sort naming parts into correct verb column
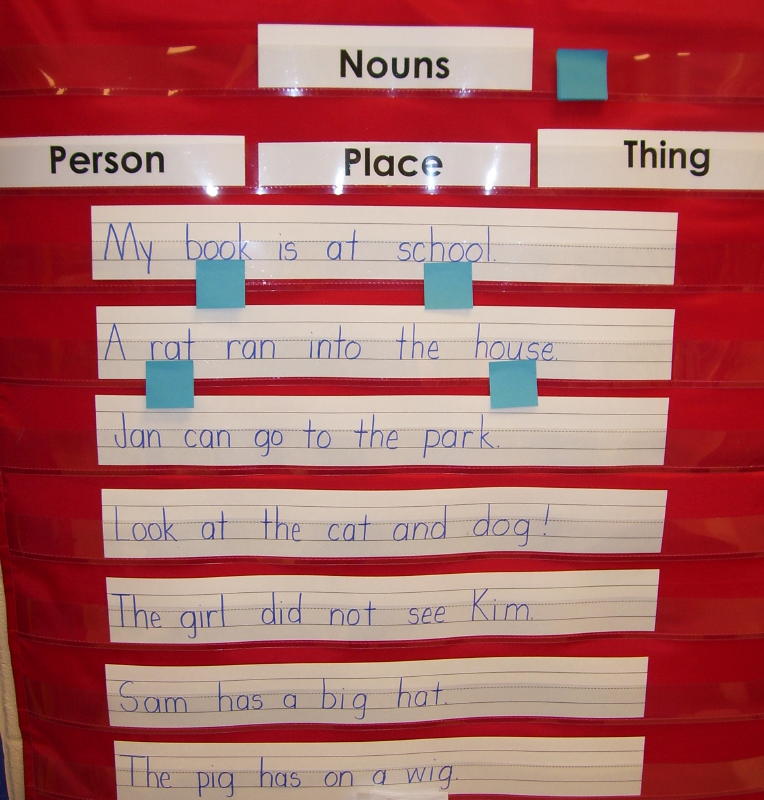
Sort nouns into person/place/thing
Label nouns in context
Sequence pictures, then sentences, then match pictures to sentences
Note: 2004/2005 I'm making a change from using Literacy Centers to using Literacy Work Stations. If you're interested in finding out more information about this, just click on the link. I've included a new page for that information. ~ I'm always changing things and doing SOMETHING new! :) ~
Each Monday, I assign 5 Must Do Centers. These Centers are "housed" in tubs on a low shelf. (You can see a picture of the tubs at My Room) I rotate the Center activities each week. Every Monday morning, instead of doing a whole group thematic activity, I go over each Center. We work through the Center together if necessary until I'm certain that they understand what they need to do, since I won't be there to supervise them when they're working ... and starting this year (2002 - 2003), I'll no longer have a TA for assistance. So it's important that they be able to complete the activities on their own. Each student has their own Work Card with a graphic of a chalkboard on the front that says, "Please check my work" and on the opposite side a construction worker. That side says, "Under Construction." Both sides have the student's name. Once they finish a Center, they put their Work Card on it that says , "Please check my work." Then when I get a free moment, I can check for accuracy. If there are items wrong, then the student is instructed to rework them, and I reteach if necessary. The opposite side of the Work Card, "Under Construction" is used when the student is called away from a Center and isn't finished. They place the "Under Construction" side of the Work Card on their work, and other students know not to "mess with" it, and I know that it's not ready to be checked.
click on images to enlarge Once the student has successfully completed the Center, they get a sticker for that Center # by their name. This helps us to keep up with who's done what Center. On Mondays, each student that's completed all 5 Centers successfully for the prior week, takes home a Learning Center certificate with their papers that they take home to be signed. I also attach a page to their papers that shows what Centers they completed for the week. I'm going to begin listing some of the literacy activities that I use in the Must Do Centers after the following list of Can Do Centers. Still have questions about how I run Centers or just want more information? I've started a "Frequently Asked Questions" page that might help. Check it out to see if the information that you're looking for is already posted there. Frequently Asked Questions About Centers Can Do Centers: Making Words ~ Have students use different types of things to make words. They can use blocks with letters, magnetic letters, foam letters, tactile letters, sandpaper letters, string beads with letters, plastic letter tiles, snap-cubes with letters (Reading Rods) Read the Room ~ I have a big painted coffee can filled with pointers. There are pointers of every sort. Many of them are items that were designed to be used as something totally different. :) I have a large (and I mean large) toothbrush, a "once-upon-a-time" long cinnamon stick that has since been broken, so now I have an "individual sized" pointer; a dolphin backscratcher from Gulf Shores, a bee shaped plastic flyswatter, an apple glued to the end of a loong, skinny dowel with a ribbon tied around it, a shorter and fatter dowel with a frog pencil topper on it, a wand with a yellow puffy star glued to one end with metallic streamers hanging down that I purchased in the toy section of Cracker Barrel, etc. Since collecting all these pointers, I've learned that I can easily and cheaply make my own pointers to match whatever theme or unit I'm working on. I now go to Wal-Mart and purchase the long dowels that are about the same size around as a pencil. My husband cuts them in half for me, then I top them with an appropriate pencil topper. For my Apple Unit I had an apple pointer, then for October I had a pumpkin pointer, for January a snowman, etc. There are pictures of other theme based pointers on some of those pages. The thematic pointers are only out during the time of the theme. This keeps things new and fresh. Recently I've added several new pointers to my collection. Carol sent me a short wire type pointer with a star on it from The Learning Tree (not really intended as a pointer though) and I purchased two packs of pencils with chocolate erasers. So now I have pointers topped with Hersey's bars, a Kiss, and a Reese's peanut butter cup. The pencils themselves went into my Treasure Box. I got these neat pencils at where else but Wal-Mart! :)
Anyway, the children use the pointers along with plastic eyeglass frames to "Read the Room". They go around the room reading all the charts, poems, songs, etc. that they find in the room. They can also use the individual sized pointers for reading in the Reading Center, their Poetry Journals, or in their Book Boxes. I keep my eyeglasses (sunshades minus the lens, and clear safety glasses) hanging around the rim of the can that hold the pointers. Write the Room ~ Write the Room is similar to Read the Room, but instead of reading everything, they're writing everything. You provide the "props" of fun writing utensils and a paper loaded clipboard. Book Boxes ~ The students spend the time revisiting the songs/poems in their Poetry Journals, along with the many student-sized books that were made in class, as well as the puppets and other literacy manipulatives that we've made. Reading Center ~ Two students can visit the Reading Center and read free choice books from the class library. I have my books in a student-sized book display stand along with two student-sized plastic chairs (purchased the chairs at the Dollar Store for $5 each). The Reading Center books consist of books that have already been used in the the current theme/unit study, along with any classmade books, ABC books, and general category books that aren't used in a theme/unit. I have so many books, that I can change them out periodically. Listening Center ~ I have lots of cassettes and books that I've purchased through the book clubs such as Troll and Scholastic. I keep these in a bin, and each tape and book is put into individual gallon sized ziploc bags (larger sized books may require a 2 gallon bag). Once my bin got full, I hung some of the bags using the shower curtain hooks and clothespins. I put out one tape and book each week for the students to listen to. The tape player sits atop the bin containing the books and cassettes along with the headphones. The student sits in a beanbag chair. Colored stickers are placed on the tape recorder buttons to help the students identify the "play", "rewind", and "stop" buttons. Once they've finished listening to the tape, then it's the listener's responsibility to rewind the tape for the next person. This Center is for only one person at a time. In the past, I've tried giving the students the opportunity to select their own books/cassettes, but after having a couple of tape players torn up and many cassettes eaten, I decided to remove the selection opportunity. I change the book/tape out weekly. If possible, the book coordinates with out current unit of study. Since I'm using the Listening Center mostly with 1st and 2nd graders, I developed a Response Sheet for them to complete "sometimes" when they're finished listening to their book. I'm saying sometimes because I still want them to have the opportunity to go to the Listening Center and just listen. I'll probably use the Response Sheet when I'm using the Listening Center as a Must Do Center or maybe for very frequent Can Do visitors. Note: the two lines under the place for the students to draw their picture is for those who want to/can write a sentence about their picture.
Magnetic Letters ~ I keep two kinds of magnetic letters stored in painted coffee cans. The students use these to form words on a magnetic easel. You can also buy an oil drip pan at automotive stores and use it as your magnetic surface. The pans look like HUGE cookie sheets. (Take a magnet with you when purchasing one to make sure it's magnetic.) You can also provide students with individual sized magnetic boards by providing them with a small cookie sheet. You can make reproducible type activities and use them in this Center by having your students place the paper on the magnetic surface and instead of writing letters or words, they use the magnetic letters. If you provide the students with pictures of objects they can form the picture name using the magnetic letters. They could also indicate the beginning/middle/ending sounds.
This is the oil drip pan. My husband painted it for me and I added new magnetic letters (caps & lowercase) from Lakeshore. Here my students were using it to practice spelling words. You can also purchase magnetic Word tiles and have students use them to form sentences, make compound words, match rhyming words/synonyms/antonyms, etc. Computer Center ~ Some very good software an be purchased for your Computer Center relatively cheaply if you keep a sharp eye out. My favorite place to purchase software is from ArcaMax.com. You have to keep a watch on their site for appropriate software, but you can purchase it for anywhere from $4.95 - $7.98. (Note: ArcaMax is no longer in business as it was. They've changed their site to PlanetCDROM.com and lowered the price to $5.99. I just placed my first order, so we'll see how it goes. 4.23.05) I've got quite a collection of software by doing this. I finally had to stop going to their site because I just couldn't pass up the deals! Some Literacy software is:
Fisher Price: Read and Play
~ The Lie
American Heritage Children's Dictionary Multimedia Nursery Rhymes Reading Development 2 Library Reader Rabbit I Can Read With Phonics Curious George Goes Home Kid Pix Studio Puzzles ~ I have many different kinds of puzzles that deal with themes/units that we're studying as well as puzzles for matching capital/lowercase letters, sequencing ABCs, color words, etc. File Folders ~ I have a tub full of all levels and types of file folder activities. The students look through and find the ones that they know how to do or the ones that they want to try. Almost all of the activities were made using the File Folder teacher resource books. A few were made using graphics software, and some were made using Ellison die-cuts. Mailing Center ~ I have a desk set up in my classroom where students can go to write messages and make cards to mail to me or their classmates. We have a central mailbox in which each student has their own mail slot. The desk is stocked with scrap paper, stamps, and cards. The mailbox is made from a wine box that I covered with contac paper and set on its side. The dividers that are built into the box to keep the bottles from breaking make perfect mail slots for us. Each slot is labeled with a student's name. Flannelboard ~ I try to keep something up on our flannelboard for the students to manipulate while retelling a story. Right now we have the 3 Billy Goats Gruff up there. I photocopy blackline pictures onto cardstock and have the aide color them with markers. Then they're laminated and cut out. To make them stick to the flannelboard, I hotglue pieces of sandpaper to the back of them. I try to have flannelboard pieces for each of the units/themes that we do. I've also bought several of those kits that go along with books that have the manipulatives for the book. The manipulatives can be used on the flannelboard.
Chalkboard Easel ~ I have a child sized free-standing chalkboard that the children can use to write on. The resistance of the chalk on the board is good for those students who have poor fine motor skills. Big Books ~ The chalkboard that I mentioned above is also a Big Book easel. The magnetic chalkboard has a large piece of wood that you put across it to hold the Big Books. The wood has two small pegs to hold the book. You can move or remove the wood as you please since it is held on by a magnetic strip. I'm now using this as a Big Book Center (from Literacy Workstations by Debbie Diller). She also suggested having the usual pointers to use, but adding other aspects to the Center as well, such as finding sight words in the book and highlighting them with highlighter tape (see Teacher Tips for alternative to commercial highlighter tape). You can also have sticky notes with words from the book that you'd like for the children to find in the text and have them stick the words on top of the word once they've found it. You can also add a writing aspect by having them make a list of sight words that they find, or write about their favorite part of the book. This Center can be for two students. Model with them how one can use the pointer while the other turns the pages. They take turns reading, then once they're finished, they swap jobs.
Must Do Centers:
Beginning Sounds: The following picture shows one of the activities that I made a couple
of summers ago to use in the Centers. I bought a small sun shaped
notepad and using the Print Artist graphics program, I made the graphics
to go along with each letter of the alphabet. On one page of the
pad I wrote the letter, on another page I glued the picture. Everything
was then laminated. The students match the letter to the picture
that begins with that sound.
Alphabetical Order: I had the TA cut oval shapes from colored construction paper using the Ellison machine. To make the ovals the right size, we used the center only of the capital "O". There are 8 ovals each of about 5 different colors. (8 ovals of one color, and 5 different sets) Then I programmed each set of ovals with one word per oval <none of the words have the same first letter> and laminated all sets. Once they were laminated, we added a small piece of magnetic tape to the back of each oval and placed them in a labeled ziploc bag. The student gets all the words and out and places them on a magnetic surface (storage cabinet, filing cabinet, magnetic chalkboard, teacher's desk, large oil pan, etc.). Then alphabetizes the words in each color group. (Will add picture later ... this activity is at school) Be sure to check out the Pocketcharts and Literacy activities above. I do A LOT of my Centers using pocketcharts. So many Center ideas are listed there. Colorful Color Words: Cut out all the color words letters from the appropriate color construction paper using the Ellison machine. The word "red" will be cut from red construction paper, "blue" will have blue letters, etc. Glue each letter to a vertical 3x5 index card that you've trimmed off 1" inch. (This is because the pocketchart rows are only 4 inches a part and you don't want them to overlap) Before gluing, lay all the cards down on a table in line. Now line your letters up on the cards where they'll be straight. I can't stand to have them look like they're zig-zagging once you get them in the pocketchart (yes, I'm a perfectionist .. can't you tell? :) ) Once you have them lined up properly, THEN glue the letters onto the cards. Then laminate. The students will use the pocketchart and place the letters in the appropriate order to form the color words. Instruct them to use the red letters only to form the word "red". Use the blue letters only to form the word "blue", and so on. If they'll need it, have a color words chart available for them to look at as a model. (picture coming) Name Necklace: This activity covers several scenerios. It can reinforce spelling of first name, spelling of first & last name, and matching capital to lowercase letters, in addition to the fine motor skills that it requires. I'm having my students this year make a necklace using their first and last names. They all know how to spell their first names, but I have some that either don't know how to spell their last name or they just learned over the summer. They have to thread all capital letter beads on a metallic cord to form their first and last name with a heart separating the two. For those who don't have a really good grasp on their letters, they have to be able to transfer the lowercase letters in their name into capital letters. I provide an ABC line for those who need it as well a name plate showing the heart in-between the first and last name. Tip: to keep the beads from sliding off the cord during the activity, tape the left end of the cord to the table on the left side of the student. That way it forces them to work from the right to the left and it also averts the normal "dropping of the beads". Gumball Colors: I made this activity using patterns from The Mailbox, but I altered it. I have a gumball machine pattern with circles inside. I programmed each circle with a color word. Each color word has a matching gumball (same size circle cut out and colored to match). Students match the colored gumball to the color word. ABC Puzzle: Match a picture to the correct capital and lowercase letter. This is a purchased puzzle set. The picture is in the middle and the capital letter is on the left and the lowercase letter on the right. There are 26 "puzzles" in the box. Each puzzle has 3 pieces. ABC Sequencing: Students sequence beads with capital letters onto a string. Next week they'll do lowercase letters. They can use the ABC line on the wall, the ABC chart, or the ABC lines as a model. (ABC lines ... stick on desk ABC line stuck instead onto a sentence strip and laminated. Number lines are put on the back of the strip.) Word Wall: Use a cookie sheet with a Spelling Mat inside. Students choose 8 words from the Word Wall to form with magnetic letters. Go Togethers from Lakeshore: This activity comes in a nice little aqua carrying case. It has pictures of everyday and not-so-everyday activities and the children sort manipulatives onto the correct picture. For ex: Farm picture - plastic cow and a small bale of "hay" (this is one of those decorative "country style" bales from the 80s) Bathroom - copper toilet (which is really a pencil sharpener) and a tiny plunger Boy looking at his teeth in mirror - tiny toothbrush and toothpaste Apple orchard - small basket and apples Bare feet - doll sock & shoe Snowy day - tiny muffler & toboggan
Street picture - stop sign and toy car
*find as many of their spelling words as they can on a page of the newspaper and highlight them with a highlighter *write their words in shaving cream *Rainbow Words: I provide them with their spelling words typed out in a large dotted font and they trace over them with at least 4 different colors. (The font is Zyia Learns Letters and can be found at Billy Bear's Playground and at The Teacher's Parking Lot to download) *Letter Tiles: I provide them with all the letters they need to form all their words using 1 inch paper letter tiles. They cut out the tiles and glue the words on another sheet of paper to form their spelling words. I have a blank grid on a sheet of paper that I reproduced many times. Then each week I just fill in the grid (mixing up the letters) and copy them if needed for each student. *Word Scramble: I go to Educational Press and create a word scramble using the spelling words and print them out. *Word Searches: This is very hard for some of my students. I go to Puzzlemaker and create word searches using their spelling words. *Magazine Words: They find their words in magazines and cut them out, or if they can't find the words, they find the letters and build them on a sheet of paper. *Slates: They practice spelling their words on slates (mini-chalkboards) with someone else calling them out. They use old, clean socks as erasers. *White Boards: This is the same activity as above, but we use mini-white boards. A student teacher gave me enough for my class when she bought a piece of showerboard and had it cut into 1 foot squares. She covered the edges with electrical tape. I also use the whiteboards on Thurs. sometimes to have a practice spelling test. I call out a word, we WRITE, HIDE, and then when I say SHOW we all turn our boards around. I participate by writing the word as well, and they check their word by mine. They really like doing this. *And sometimes I just have them write their spelling words 3 times each. Boring! :) *Use the magnetic letters to form their words (see picture above) *Use letter stamps and ink pad to stamp words on paper *Use playdough and playdough letter stampers to form words. *Pocketchart Spelling shown above using pocketchart letter tiles * Plastic Letter Tiles: Provide students with a Spelling Mat and have them form their spelling words using the plastic letter tiles. The tiles were purchased from Wal-Mart and are now stored in a plastic storage box with 24 compartments. The box I also purchased from Wal-Mart in the hardware section. I labeled each compartment with a capital and lowercase letter. The children initially sorted the letters into the compartments. The Spelling Mat is a sheet of construction paper divided into rows according to the size of the letter tiles. Then the mat was laminated. Students use it to keep their letters in line and neat. *Spelling Rods: I just purchased spelling rods for my students to use to form their spelling words. They look like Unifix cubes, but have letters on all 4 sides (caps/lowercase). Vowels in red, consonants in blue.
*
Survivor Challenge: Every Thursday I spend the 45 minute tutoring block
with my 2nd graders working on reviewing their Spelling Words for their test
on Friday. We usually play some kind of game or do something fun. The game
part is an incentive to try and get them to study on their own, since only 1
out of the 4 them do that. And the one that does it is so that he can win!
:) Anyway, this past Thurs. I came up with Survivor Challenge. The kids
LOVED it and begged that they be able to play again next Thurs.
To play, we went outside on the playground
so that I could set up an obstacle course. I took a small table, plastic
letter tiles in a storage box with compartments, 2 lists of words typed big,
and a clothespin. (Don't forget a pad and pencil for scorekeeping like I
did!) I set up the table with the letter tiles box in front of the teacher's
bench. That would be the "start" of the course. The obstacle course was that
they'd run and go up the stairs, through the tunnel, down the slide, and back
to the table where they'd spell their word that they'd been told BEFORE they
left. If they needed help with the spelling, they could run over to the fence
where a list of the words had been posted, but then they still had to go
through the obstacle course. The first person back to the table and to get
their word spelled correctly won the point.
The rules for the game were: they had to
keep their shoes on, when not in play they had to sit down on the grass in the
specified area close to the teacher, and their letter tiles could not fall off
the table. If their tiles fell off the table, they were disqualified for that
round. (This would keep things from getting too wild!) In hind sight, I
wished that I'd provided those not in play a list of spelling words on a
clipboard to be studying while they were waiting their turn.
I checked the playground schedule ahead of
time to make sure that other classes would not be out there. But somehow that
did not work out. At all times there were other classes out there. So we had
to modify our course and just run straight to the fence and back. The other
teachers were good at helping keep their students out of the pathway. As a
matter of fact, the 3rd grade teachers liked the game so much, they want to
try it with their students!
The reason I came up with this game was
because the same student kept "winning" our spelling games every week (because
he studied!!!). So I thought this would be a good way to get the children
outside during the beautiful weather and to slow him down a bit. He still
won!!!!! :)
*Spelling Fluency: These are some things I'd probably do on a rotating basis-
This was my Word Wall. I used a graphics program and typed up all the sight words in different colors and two words to a page. I printed them out onto cardstock, cut them apart, and then had them laminated. Now I can use the sight words from year to year. We started off the year with the students' names and then I started adding 5 new sight words per week. One year, after doing the students' names I started with the color words, months, days of the week, and sight words simultaneously. (I added one color word and sight word a week; the month and day of the week as it came.) Last year, since I'd made the words bigger, I knew I wouldn't have enough room for all the words, so I changed how I introduced them. On the "calendar wall" I had the days of the week and months of the year posted, and I had several charts of the color words for the students to use. Even with deleting all those words from the Word Wall, I still didn't have enough room for all the words we'd covered.
All classes are required to have a Word Wall this year. Now I have different types of Word Walls. The portable thematic one in the pocketchart, a skill specific one that you'll see in a moment, and this is is my 20 most basic sight words Word Wall. It's a small bulletin board, so I couldn't get more words than this on it anyway. And I don't know why I didn't take a picture of it, but on the left hand side of this Word Wall, I added the students' names. I did that because they wouldn't fit on the Word Wall per se even though there are only 6 student names.
I have students who are working to learn the words on each of the types of Word Wall.
I finally jumped on the bandwagon that everyone else has been riding for the last several years and moved to an alphabetical Word Wall instead of a leveled Word Wall. Before, I added the words in the order they were on my word lists and they were broken down into levels (Primer, 1st, 2nd, etc.). This was helpful to me since I wanted to review the words daily on the wall and I have very different levels of sight word readers in my classroom (SPED K-2). Having them leveled let me start my emergent readers off reading and then when we'd covered the words they were working on, I'd switch to my more advanced students to read. Putting the words in ABC order doesn't let me do that. But, a strength for this set-up is that it does allow my more advanced students to find the word they're looking for more easily.
I created the word cards on the computer and added a fancy little border to each to match my classroom. I made sure that the size of the words were large enough that they could be seen from the students' seats. I printed them on cardstock, laminated them and added a small piece of magnetic tape to the back. I thought I was soooo smart! But once I got them up on the wall, I didn't like them for several reasons: 1 - they took up more room than I wanted them to, although I could get more words on the wall. 2 - because they are no longer "multi-colored", they all look pretty much the same. It's not as easy for my students to distinguish between the words.
I'm sure there's more reasons, but I can't think of them right now. :) I want to redo them AGAIN, but I hate to toss all that hard work. Maybe by this summer I'll be tired enough of them to start over.
'06 - '07 I redid my Word Wall again! Much more to my liking this time and much more student friendly. Still in ABC order but easily read. The first part is stapled to my bulletin board and the second part I put magnets on and used my white board. The biggest drawback is that it takes up a lot of my whiteboard.
We also use Word Wall words
to play Word Wall Bingo. The students are given a page with 9 blocks. They
choose 9 words from the Word Wall that they know and write one word per
block. Then we play Bingo using seasonal markers (mini-erasers, candy,
etc.). The person to cover all their words first wins.
Daily News: At the beginning of the year, I always start out using Daily News. Then as the year progresses and time gets tight, I usually drop off doing it. I do Daily News with the children. I have a "short" chart tablet that I put on my easel. I sit in a chair and write as they tell me what and how to write it. The News always follows the same format each day. It looks something like this:
The students tell me when to write capital letters, punctuation, what words to write, and how to spell them. We do this after doing the calendar and weather, so that is still fresh in their minds. Then each person gets a day to report some news that they'd like to share. If they don't have any news, then we just go to someone else. In the past, I've typed up a list of the students' names vertically, added a clipart graphic to the top of a newspaper that says "Daily News", and then printed it onto cardstock. Then I've had it laminated and I post it close to the easel with a clothespin that says Daily News on it. The clothespin is placed on the name of the person who's turn it is to do the Daily News. Each morning it's moved to the new person's name. After we finish writing the News, I read it to the students. Then we read it together. Then they read it to me. Last, I go through it and circle or point out different elements or words and have the students identify them for me. By doing this, I can reinforce the skills of those who are working on single letters and sounds, or those who are working on sight words, or those who are working on blends, digraphs, or chunks, or even those who are able to use their context clues to figure out unknown words. In the message above, I could even reinforce the skill for the student who was working on identifying compound words. Secret Message: Kerry posted this on the 'net as an alternative to Morning Message. It was a long post and unfortunately some of what I'd saved got deleted. But I'm going to take a stab at trying to at least get the gist of the post down. I know that it isn't exactly as she stated it, but hopefully it will at least be something useful. I think I'm going to try it tomorrow. I've not used Morning Message, but from what I've read it's where the teacher writes a message for the students before they enter the room in the mornings. Later they read the message together and discuss it, similar to Daily News. However, in Kerry's post, the teacher would put up a secret message for the students to decode. This message would be written on a magnetic surface such as a white board or chalkboard. Instead of words, there would only be blanks for each letter, similar to the Wheel of Fortune game or Hangman. The students would be provided with magnetic letters with which to fill the blanks to form the words. Of course to begin with, your message would only consist of one short sentence. She gave the example of: Today we will go outside. But instead of writing that on the board, you'd use only blanks, such as : _ _ _ _ _ _ _ _ _ _ _ _ _ _ _ _ _ _ _ _ The students will take turns guessing a letter that might be in the message. If the letter is in the message, they get to add that letter in the appropriate place(s). If the letter is not in the message, it goes into a "discard" circle. This gives the students practice in using their letter sounds, chunking, decoding skills, context clues, and spelling. Each day you would follow the same format, and when appropriate make the sentence(s) a little more difficult. They also sort their letters into categories of consonants/vowels/both before beginning, while reviewing the sound of each letter. They also take this time to review that every word has a vowel. They keep a group score by counting up how many letters were put into the discard circle. Each day they try to get fewer letters in the discard circle than the day before. If they do get to zero, then they try to see how many days they can maintain their score. I cut and pasted part of Kerry's message here because she explained the benefits of this activity better than I ever can. Kerry wrote: <<In this way, the children start to recognize, learn to spell, and look for sight words and chunks (such as or in morning). They also start to look for two space words (_ _ ) because they start to realize that it must say something like to or go or be and that three spaces (_ _ _) might likely be and or the. It also helps build the concept of letter vs word vs sentence. We also tell them that vowels are very important and that every word has at least one vowel, so after a while they start trying the vowels immediately. They also realize that very few words have letters like X, Q, or Z and so they dont choose these letters. As the message begins to appear, we read and reread the parts that are complete. This became a tool to introduce the concepts of context clues and what would make sense in this sentence? and what word would sound right here? and what word starting with an m would make sense in this sentence? etc. We also used the message to discuss capital letters and punctuation.>> She also wrote that eventually your message might look similar to this: Good morning!
And eventually like this: hello boys and girls
This last message would give them the opportunity to discuss capital letters and punctuation. Update: I did give this
activity a try and my 2nd graders LOVED it! After doing it one day,
they reminded me to do it the next day after I'd forgotten. I wrote
the message on the white board using the blanks, then wrote the ABCs underneath.
They took turns guessing letters, and as they guessed them I added them
to the message if appropriate and erased that letter from the line-up.
They knew if they didn't see the letter in the line-up, not to use it.
They "solved the puzzle" both times before all the letters were added.
5 Ws Poem
One of my kids wrote:
Teaching Summary and Retelling:
Who (was in the story)
Vowels
Mind Reader: Pick a word off the Word Wall. Do not tell the students the word. Have the children number their paper from 1 to 5. The first clue is always, Its on the word wall. Then narrow the clues down. For example, it has 5 letters, it starts with p, it has a long vowel, until on the fifth clue theres only one word it can be. This game was posted on the 'net. Writing a Letter song:
First you write the heading,
heading, heading.
Next you write the greeting,
greeting, greeting.
Then you write the body, body,
body.
Then you write the closing,
closing, closing.
Under that you write your
name, write your name, write your name.
Long and Short Vowel Chants:
*change the vowel and sounds for each new chant Rolodex Pictionary: This could be used either during Journal time or during Center time. We made a Rolodex Pictionary to be used to assist in writing unknown words OR to give ideas to use in writing. I bought a mini-rolodex and added a small picture to each card. Along with the picture, we wrote the word. The students sometimes use it during Journal time, and sometimes I assign the students to choose a specific number of words and write sentences with them as a Center. Story Walk: Tricia posted this idea and it's a wonderful idea to use as a Home-School Connection activity. When sending home a book for your students to read with their parents (great idea for those Take-Home Totes), send along this visual to help the parents share the book with their child. Choose an appropriate shaped notepad to coordinate with the book, or you could use something generic. Print the following on each page of the notepad and laminate. Bind all the pages together and include with the appropriate book. (cover) Story Walk: Let's
go!
Also, this could be used with tutors to help children build a sense of story or story elements. Comprehension Song: Libby posted that she helps her students to write a song to reinforce comprehension after reading a book. She asks the students the questions and records their answers on chart paper. Then she writes their answers, reformatting when necessary, to the questions and they sing them to the tune of Frere Jacques. Here are the questions that she asks: Where is the character at
the beginning of the story?
This is the song that her class wrote for The Kissing Hand by Audrey Penn. The Kissing Hand Song
Chester at home
:) Since she posted it on the World Wide Web, it will probably be floating around and shared over and over again at the beginning of the next school year as a new "Kissing Hand " song! Contraction Crash Dummies: Someone shared that they used two crashing cars (pictures) as visuals to teach contractions. She had "can" written on one car, and "not" written on the other. Then she crashed them into each other and told her first graders that "n" and "o" did not have on their seatbelts and were thrown from the car. Then they were replaced by the apostrophe. This helped her students to remember where to put the apostrophe and she was able to incorporate a safety lesson into the lesson as well. If you laminated the cars before adding the words, you could reuse the cards, AND by labeling the cards with a Vis-a-Vis pen, after the crash you could wipe out "n" and "o" and replace them with the apostrophe. Compound Words: Several good activities have been shared lately dealing with compound words. I've already shared the one in the pocketchart section. Here are some more. * To introduce compound words, you might want to start out with a visual. You'll need 3 pictures for each compound word. For example, football. You'll need a picture of a foot, a ball, and then a football. Fold a piece of cardstock into thirds where two flaps meet together OVER the third section (the size of your cardstock will depend on the size of your pictures). Glue the picture of the foot on the edge of the first flap away from the fold. Then it's optional whether or not you write the word underneath it. Then on the next flap, glue the ball on the edge away from the fold. Then open the flaps up and glue the football inside the flaps. When finished, you should have the picture of the foot on the first flap, and ball on the second flap. When you open it up, you'll have the football inside. * Write compound words onto sentence strips, and to demonstrate how a compound word is two small words put together to form a a new larger word, snip the two smaller words apart. After the students are very familiar with the words, distribute a word card to each student and have them find the person who has their "other half" of the compound word. To help them distinguish which word comes first/last, you could color code the words. All the words that come first could be green, and all the words that come last could be red. You could also have the students match these words up in the pocketchart. * Another pocketchart activity could be to provide the students with pictures of things that are compound words: doghouse, butterfly, boxcar, hotdog, cupcake, football, etc. Then provide them with the words on cards to use in forming each compound word. They would have to form the compound word to match each picture. * I also do a hand motion that hopefully helps them visualize it a little better.
Hold out my right hand and say "base" Hold out my left hand and say "ball" Slide my two hands together and say "baseball"
* Create picture cards with the words below them and then a word card for a station activity. Students match the two picture cards and then find the compound word card that goes with it. (picture of rattle + picture of snake = word rattlesnake) File Folder Activities: Remember, if you don't want to use worksheets for their intended purpose, then you can always cut them up and create file folder activities. Those cut-and-paste worksheets work especially well for this. Sight Words: To teach sight words, of course we daily review the words on the Word Wall. I break my kids into groups, then we play sight word games. Even simple flashcard games the kids love! One of their favorites is CRASH! I put all the words in a pail (or something thematic or seasonal) along with a couple of CRASH cards. They pull out a card, if they can read it, they keep it. If they can't, I tell the whole group, and it goes back in the pail. If they pull out the CRASH card, they have to put all their cards back in the pail. The person with the most cards wins!
CRASH!, ZAP!, BANG! all the same game with different names. Here's more directions: http://www.canteach.ca/elementary/beginning11.html
Sequencing: We
do five different types of sequencing activities 4) Put sentences in the correct order to form "stories". These aren't like literature stories, but are just little stories dealing with things that the children are supposed to be familiar with, like going to a birthday party. 5) I have to change this to 5 different types of activities since I'm now adding this one! :) I'm working with a 2nd grader on sequencing for Language Arts and I wanted to take it a step farther than just sequencing pictures, so I'm having him sequence pictures and then write a sentence to go with each picture. Here's the activity that we did today....
To help him with the sentence writing, we
put the pictures in order on the board with magnets and then I drew a line out
from each one for him to write his sentence on. Then he was to write his
first sentence to go with the first picture. I took a different color marker
and did "underwriting" with him. Except that I did something a little
different this time. Everything that he got correct like capital letters at
the beginning of the sentence, periods, and correctly spelled words got a
smiley face above the word. Then we counted how many smiley faces he got.
When he wrote the second sentence, he tried to get more smiley faces than what
he had on the first sentence. And he used the corrections that we'd talked
about in the first sentence to help him in the writing of the second
sentence. With each sentence he tried to get more smiley faces than in the
previous sentence. Afterwards, he had to go back and read all his sentences
to me. Then he erased the sentences to complete the activity on his own paper
by gluing the pictures in order and writing the sentences.
Tomorrow we'll see how much of the lesson
actually carried over. But I was very impressed with how involved and
interested he was in a writing lesson. Usually that's the worst for my
students!
Response Boards: For writing, one of my students' favorites is to use the mini whiteboards and markers. (You can make your own boards by buying showerboard and cutting it into 1 foot squares and covering the edges with electrical tape.) We play Write/Hide/Show. I tell them to write a specific capital letter, lowercase letter, spelling word, etc., then they "hide it" (don't show to anyone), then "show" when I say, "Show." They all turn them around and let me see. I also have a board and am doing the same thing. So they look at mine and if theirs isn't right they have to correct it. And I can tell at a glance who knows and who doesn't. And it's ok if they "cheat" off of someone or something, because I can see that too and they aren't embarrassed if they don't know. Mr. Munchy Mouth: Mr. Munchy Mouth is a spin-off of the Sound Muncher craze. I wanted him to be able to "eat" whatever skill we were working on, not just sounds, so Mr. Munchy Mouth was born. (I think I borrowed the name from Letter People) Mr. Munchy Mouth is a mini tabletop trash can that my former TA decorated in order to give him some personality. I'm going to add a felt bowtie and a velcro circle to the front on his tummy so that I can attach a card for the skill we're working on. Below are the printable cards that I made for him to eat. If we're working on the /b/ sound, then he's only to eat the pictures of things that begin with a "b." (You'll need to download all the sets. I just broke them up into sets to keep the file from being so large, making it easier to download.)
Beginning Sounds Cards Naming Part/Telling Part: I created these activity sheets for my 2nd grade inclusion students. The reading level has been lowered to first grade. Hopefully I can get a picture online one day so you can see what they look like before having to open/save the document.
I Spy: I created this game after coming across a printable ABC chart on the 'net. I printed the chart on cardstock, decorated it with stickers, and laminated it. I made enough of these for each student in a small group to have one. To play I say, "I spy a T" or whatever letter. Each student gets a turn pointing to the letter on their chart. We do not keep score. As I was explaining the game to someone else so that it could be modified and used for sight words (type up a sight words list in a grid similar to a Bingo card), I thought that it might be even more beneficial to let the student who responds correctly to "spy" the next letter or word. I think I like that even better! :)
Mini Offices: I finally got my mini offices completed for literacy (not math) and the pictures taken. I decided to do separate offices for math. They will be used by my students during independent work time, writing, and math. We have plain offices for test taking. My students like them and ask to use them to secure the privacy of their work. Below my pictures are the links that I've collected and there you'll find many of the printables that I used as well. Some of them I adapted or created myself to better meet my students' needs. I used 2 gingham folders stapled together for each office.
front of the offices - I did 5 different colors
front - since I teach K-2 you'll see aids for a myriad of skills; here a manuscript printing guide as well as a list of the question words with blanks where I can add in new words with a black Sharpie
inside
inside left
inside right
outside
outside left
outside middle - I didn't really want my students to have to use the backs of the office, but I ran out of room, so I put this "reminder sign" on the back for those who'll be working around them, since this is what they'll see. There are different messages on each office, like "Shhh! Thinking going on!" and one even says "Zzzz!" (just my quirky sense of humor!) :)
outside right
the office when it's standing up for use
This is a printable for my sight words list. I think it's K-2 words. I can't share the things I created with the bear graphics because of the TOU of the graphics company. :(
Mini Offices http://www.busyteacherscafe.com/mini_offices.htm
Reagan All Star Mini Offices http://www.reagankinderbears.com/printables.htm
Writing Mini Offices http://www.mrsdryzal.com/minioffice.html
Writing Checklist http://teachers.net/gazette/MAY03/images/WritingChecklist.pdf
Mini Offices http://www.jmeacham.com/mini.offices.htm
Materials http://mrs_roselle.home.att.net/materials.html
Mini Office Printables from K2 Printables http://k2printables.com/mini-offices.htm
Kindergarten Mini Office http://k2printables.com/mini-offices.htm
Mini Offices for Students K-3 http://www.teachingheart.net/minioffice.html
Mini Office http://www.wearablelessons.com/miniofficesample.html
Miscellaneous Printables: There are some things that just don't seem to fit neatly in any where, so I'm going to "file" them here. :) It's better than "ole file 13!" :)
Teaching Objectives: Recently in our faculty meeting it was mentioned to us that it was good practice to state the objectives that were being taught on the board so that the students would know what was to be covered. This is somewhat hard for me because of all the different objectives and lessons that are going on (not your traditional classroom). But to give it a try, I created this display to post the objs. for my Language Arts block for the week. Instead of writing them in obj. form, I abbreviated them so my students could better understand/read them. I change them each Friday afternoon. I introduce them on Monday morning and try to review them before we start each day. It does make a good point of entry for reviewing skills.
The Teacher's Bookbag http://www.teachersbookbag.com
Literacy Work Stations: Making Centers Work ~ Debbie Diller Classrooms That Work ~ P. Cunningham & R. Allington The Daily Five: Fostering Literacy Independence in the Elementary Grades ~ G. Boushey & J. Mosher Growing Readers: Units of Study in the Primary Classroom ~ K. Collins & L. Calkins Guided Reading: Good First Teaching For All Children ~ Fountas & Pinnell The Struggling Reader ~ Cooper, Chard, & Kiger And With a Light Touch: Learning About Reading, Writing and Teaching With First Graders ~ Carol Avery Read It Again ~ Brenda Parkes (reading strategies) About the Authors ~ Ray & Cleveland (writing workshop) On Solid Ground ~ Sharon Taberski Inside the Classroom: Teaching Kindergarten and First Grade ~ Bobbie Fisher (beeline books) Kid Writing: A Systematic Approach to Phonics, Journals, and Writing Workshop ~ E. Feldgus & I. Cardonick (Wright Group) Morning Message and Other Shared Writing Lessons (K - 2) ~ C. DaCruz Payne & M. Browning Schulman (Scholastic) 25 Emergent Reader Mini - Books: Easy-to-Make Reproducible Books to Promote Literacy (K - 1) ~ Maria Fleming (Scholastic) 15 Reproducible Write-and-Read Books: Instant Patterns for Easy Predictable Books Your Students Help Write! (K-2) ~ Veronica Robiliard (Scholastic) 25 Holiday & Seasonal Emergent Reader Mini - Books (K - 1) ~ Maria Fleming (Scholastic) Phonics: Quick-and-Easy Learning Centers (K-2) ~ Mary B. Spann (Scholastic) Phonics & Reading: Building Phonemic Awareness & Early Reading Skills (K) ~ B. Gruber & H. Chirinian (The Mailbox) Developing Literacy Using Reading Manipulatives (K-2) ~ Sandi Hill (Creative Teaching Press) Pocket Chart Alphabet Activities (K-1) ~ Mary Kurth (Creative Teaching Press) Reading Recovery: A Guidebook For Teachers in Training ~ Marie Clay Observing Young Readers: Selected Papers ~ Marie Clay Never Too Early To Write The Literacy Center ~ Lesley Mandel Morrow Whitt's Kits
|
||||||||||||||||||||||||||||||||||||||||||||||||||||||||||||||||||||||||||||||||||||||||||||||||||||||||||||

|
||||||||||||||||||||||||||||||||||||||||||||||||||||||||||||||||||||||||||||||||||||||||||||||||||||||||||||